The Contextual Commerce SDK supports display of inline campaigns. Inline campaigns display via views embedded in your application’s user interface. The following image shows an example inline campaign.
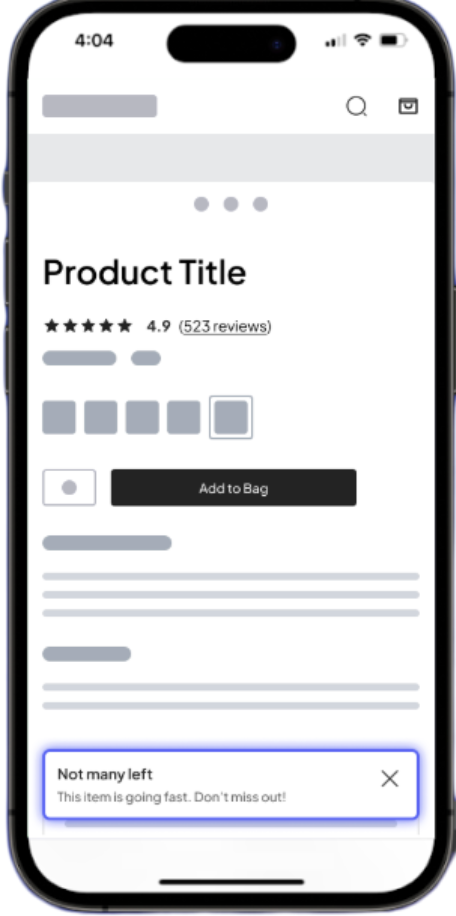
The Contextual Commerce SDK supports both UIKit and SwiftUI. Refer to the relevant section for your implementation:
UIKit implementation
Step 1: Add the parentView parameter
-
Update your
Granify.trackPageView(...)calls. -
Add the
parentViewparameter. This must be a superview containing all the subviews on the current page. We require this view to locate all theGranifyInlineViewon the page.
Step 2: Add the view to the layout
-
Add a
GranifyInlineViewobject to every position on the page where an inline campaign is desired. - Ensure the view is initially hidden by setting the height constraint to 0.
- If using Interface Builder, set the top constraint to the view above and the bottom constraint to the view below.
The following are recommended constraints if you are using interface builder and storyboards:
- Height constraint of 0
-
Top of the
GranifyInlineViewconstrained to the bottom of the view above -
Bottom of the
GranifyInlineViewconstrained to the top of the view below

UIStackView, only the height constraint of 0 is needed.
Step 3: Configure expand and collapse handlers
Because the view starts hidden, you must configure handlers to manage the animation.
-
Create an expand handler using
GranifyInlineViewExpanderto adjust height when a campaign is available. -
Create a collapse handler using
GranifyInlineViewCollapserto return the view to 0 height. -
Pass these handlers to the view using
setExpandHandlerandsetCollapseHandlerinsideviewDidLoad()of the current view controller.
If you create a GranifyInlineView programmatically, you can pass these handlers during initialization. Use the following handlers if you used the preceding recommended constraints:
Code |
|
Step 4: Initialize the label
-
Initialize the
GranifyInlineViewLabelparameter. -
Assign a
namestring to the label usingGranifyInlineView.setLabel(label:).
A GranifyInlineViewLabel has three fields:
-
name: Required. Identifies the associated
GranifyInlineView. This must be unique per location on a parent view unless aproductIdis provided to differentiate items. - productId: Required if the view is associated with a specific product (such as on a product page or a specific item in a cart).
-
sku: Required if the associated
productIdhas multiple SKUs.
Provide a list of names used in GranifyInlineViewLabel to your Contextual Commerce account manager to enable campaign creation for those labels.
UITableView or UICollectionView), you must reapply the label whenever the view content updates to reflect the new content (such as productId or sku).
SwiftUI implementation
To enable inline campaigns in a SwiftUI application, you must add at least one GranifyInlineSwiftUIView to your page. The SDK handles the expanding, collapsing, and animation of these views automatically.
Step 1: Add the view to the layout
-
Insert the
GranifyInlineSwiftUIViewinto your View hierarchy at every position where an inline campaign is desired. -
Provide the constructor with a
GranifyInlineViewLabel.

Step 2: Configure product details
GranifyInlineSwiftUIView requires a GranifyInlineViewLabel passed into its constructor. This label identifies the view for campaign targeting and has three fields:
- name: Required. Identifies the associated view and must be unique per location within a SwiftUI View
productId and sku.
- productId: Required when the view is on a product page or associated with a specific product (for example, inlines tied to a cart product)
- sku: Required when the view is associated with a specific productID and SKU combination.
Product pages:
-
Set the
productIdfield. This is required for any inline campaign located on a Product Page. -
Set the
nameto be unique for that location.
Code |
|
Cart pages:
-
Set the
productIdfor any inline tied to a specific item. Include theskuif the product has multiple variants. -
Use only the
namefield for areas not tied to a specific product (for example, top of the page).
Code |
|
Step 3: Finalize integration
-
Compile a list of all
namevalues used in your labels. - Send this list to your Contextual Commerce account manager to create the campaigns.