The Bazaarvoice Shopify application allows you to use a custom metafield as the source of Bazaarvoice product IDs. You can:

Note: Every product sent to Bazaarvoice must have a unique ID. Ensure that the data you populate in the custom metafield has a unique value for all products in the Shopify system.
Use an existing metafield
To use an existing metafield, complete the following steps:
Step 1: Give access to Bazaarvoice to index your data
- Sign in to your Shopify account and go to Settings > Metafields and metaobjects.
- Select Products.
- Select your metafield definition name. For example:
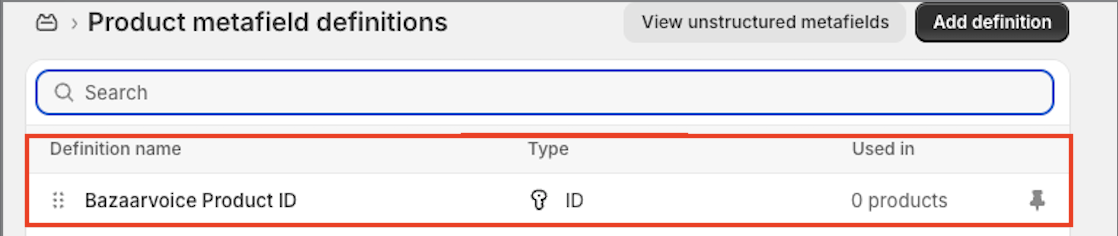
- Enable the following in the Options section to allow the Bazaarvoice app to index your data:
- Storefronts—Select Storefront API access.
- Admin API & Filtering—Select Filter on the product list and in the Admin API.
- Select Save.
Note: Variant definition types do not have the Filter on the product list and in the Admin API option. You must set the Variant definition Type to ID. Refer to this Shopify article to learn more about metafield options.
Step 2: Map the metafield in the Bazaarvoice app
- Go to the Bazaarvoice Reviews & Photos app in Shopify.
- Go to Ratings & Reviews > Configure > Product Catalog.
- Select Metafield from the Bazaarvoice Product ID Source list.
- Select the new product ID or metafield from the drop-down list.
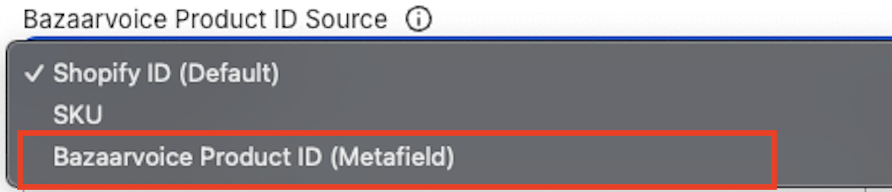
- Select Save.
Create a new metafield
To create a new metafield, complete the following steps:
Step 1: Create the metafield definition
Create a Shopify metafield to hold your product IDs.
- Sign in to your Shopify account and go to Settings > Metafields and metaobjects.
- Select Products.
- Select Add definition in the upper-right corner.
- Enter a name for your metafield in the Name field. For example,
Bazaarvoice ID. - Select an option from the Type list. For example, Single line text.
- Enable the following in the Options section to allow the Bazaarvoice app to index your data:
- Storefronts—Select Storefront API access.
- Admin API & Filtering—Select Filter on the product list and in the Admin API.
- Select Save.
Note: Variant definition types do not have the Filter on the product list and in the Admin API option. You must set the Variant definition Type to ID. Refer to this Shopify article to learn more about metafield options.
Step 2: Populate your product data
Enter the specific IDs for your products.
- Go to Products.
- Select a product.
- Go to the Metafields section.
- Find your new Bazaarvoice ID field and enter the ID used in your Bazaarvoice catalog.
- Select Save.
Note: You can also use the Shopify Bulk Editor or a CSV import to update all products at once.
Step 3: Map the metafield in the Bazaarvoice app
- Go to the Bazaarvoice Reviews & Photos app in Shopify.
- Go to Ratings & Reviews > Configure > Product Catalog.
- Select Metafield from the Bazaarvoice Product ID Source list.
- Select the new product ID or metafield from the drop-down list.
- Select Save.
Troubleshooting
The app does not recognize my IDs.
This may occur if the Storefront API access is disabled. To resolve this:
- Go to Settings > Metafields and metaobjects > Products > Bazaarvoice ID.
- Select Storefronts to give access to Storefront API requests.
Enabling this setting allows the app to read the field.